


OFF THE WALL
Getting crafty with our empty apartment wall space lately! I love tone on tone décor which is why a lot of my stuff is white, cream, beige, etc. But these plain drapes over our living room window really whitewashed the space and I've been meaning to add something of interest over there for a while. Succulents to the rescue! This was a super easy project and would make an excellent handmade gift, too.


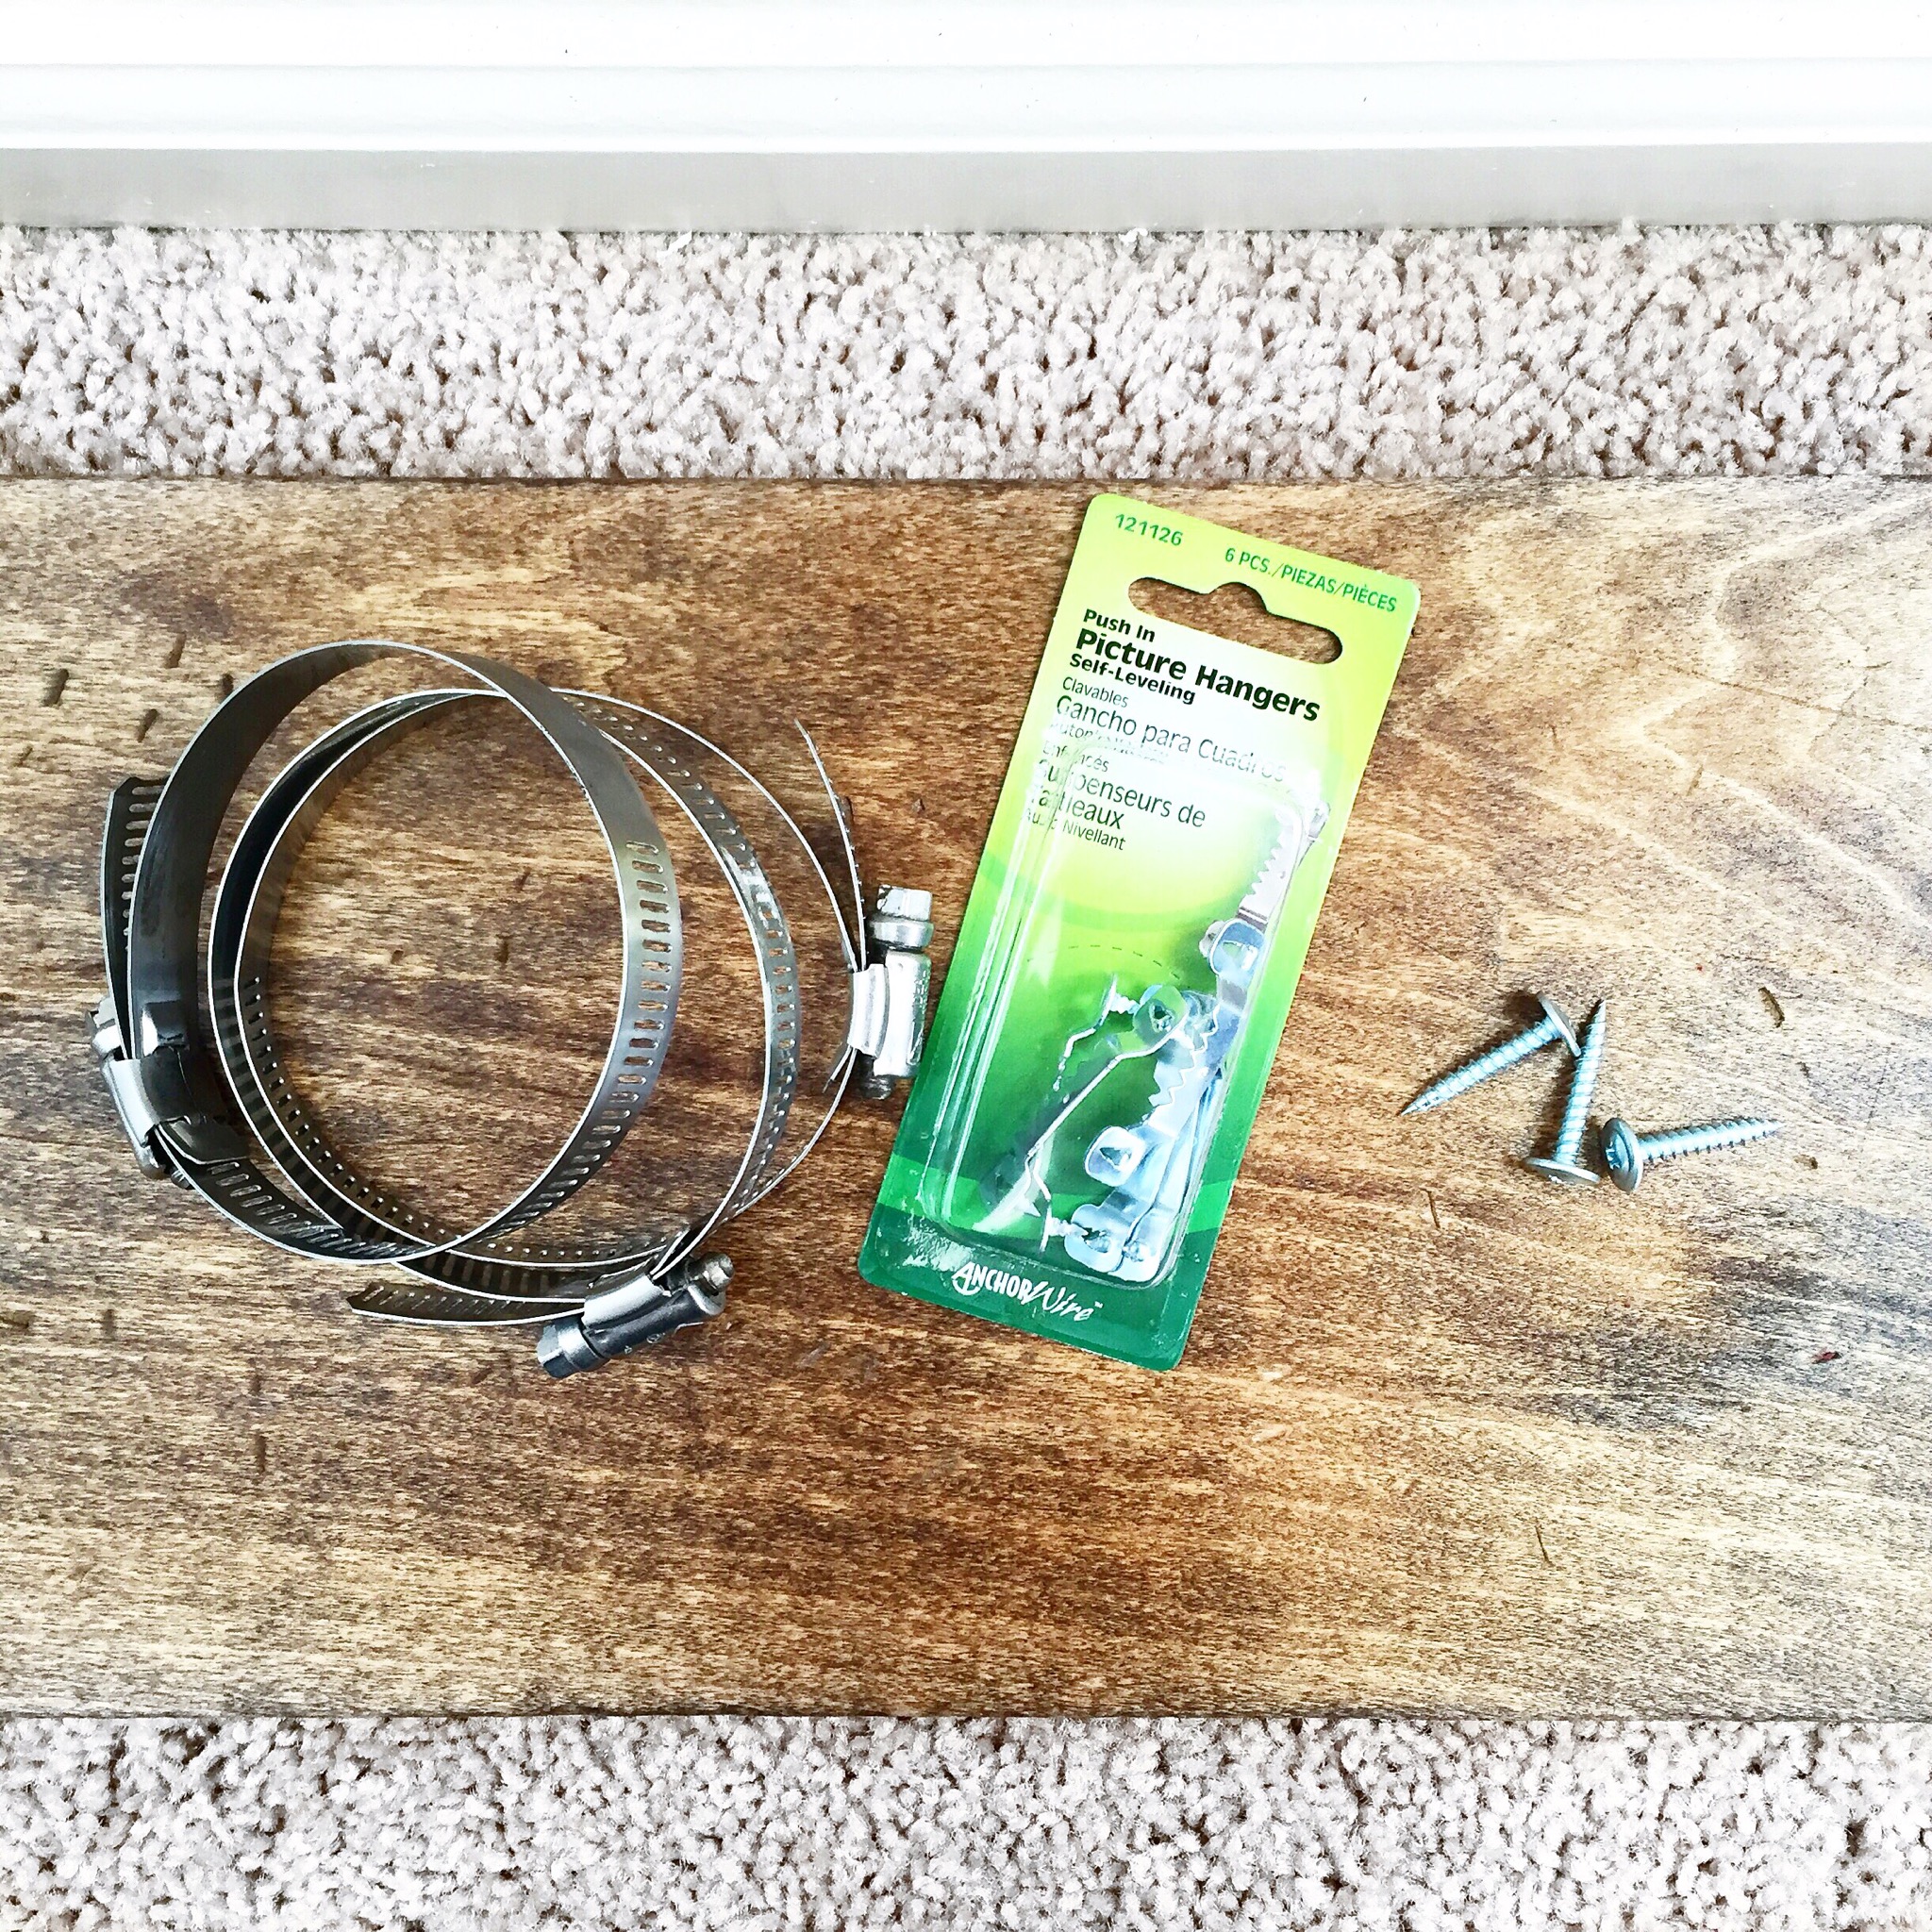
What You Need:
1 piece of wood (I found a pre-cut piece at Lowe's that measured 7.5" x 36")
3 small metal pails (I found mine at Target for $1 ea., similar here)
3 metal fittings
3 small succulents
1 can of wood stain (I used left over Provincial Walnut form my shelving project)
1 small bag of all purpose potting soil
1 sawtooth for hanging
3 small screws
a hammer and some nails to distress your wood and hang the final product
a power drill and an extra set of hands
What You Do:
Start by distressing the wood. I used the same technique that I did for my shelving project, here, if you're curious. Basically, just hammer away at your wood and scrape some sharp objects across it until you've got the look you want. Next, take the wood outside or in a well ventilated area and stain the front side using an old rag and circular motions. A little goes a long way, but you can always add a second coat later for a deeper finish. Don't forget your edges! You may leave the back side unfinished to save time since it will be hanging on the wall.

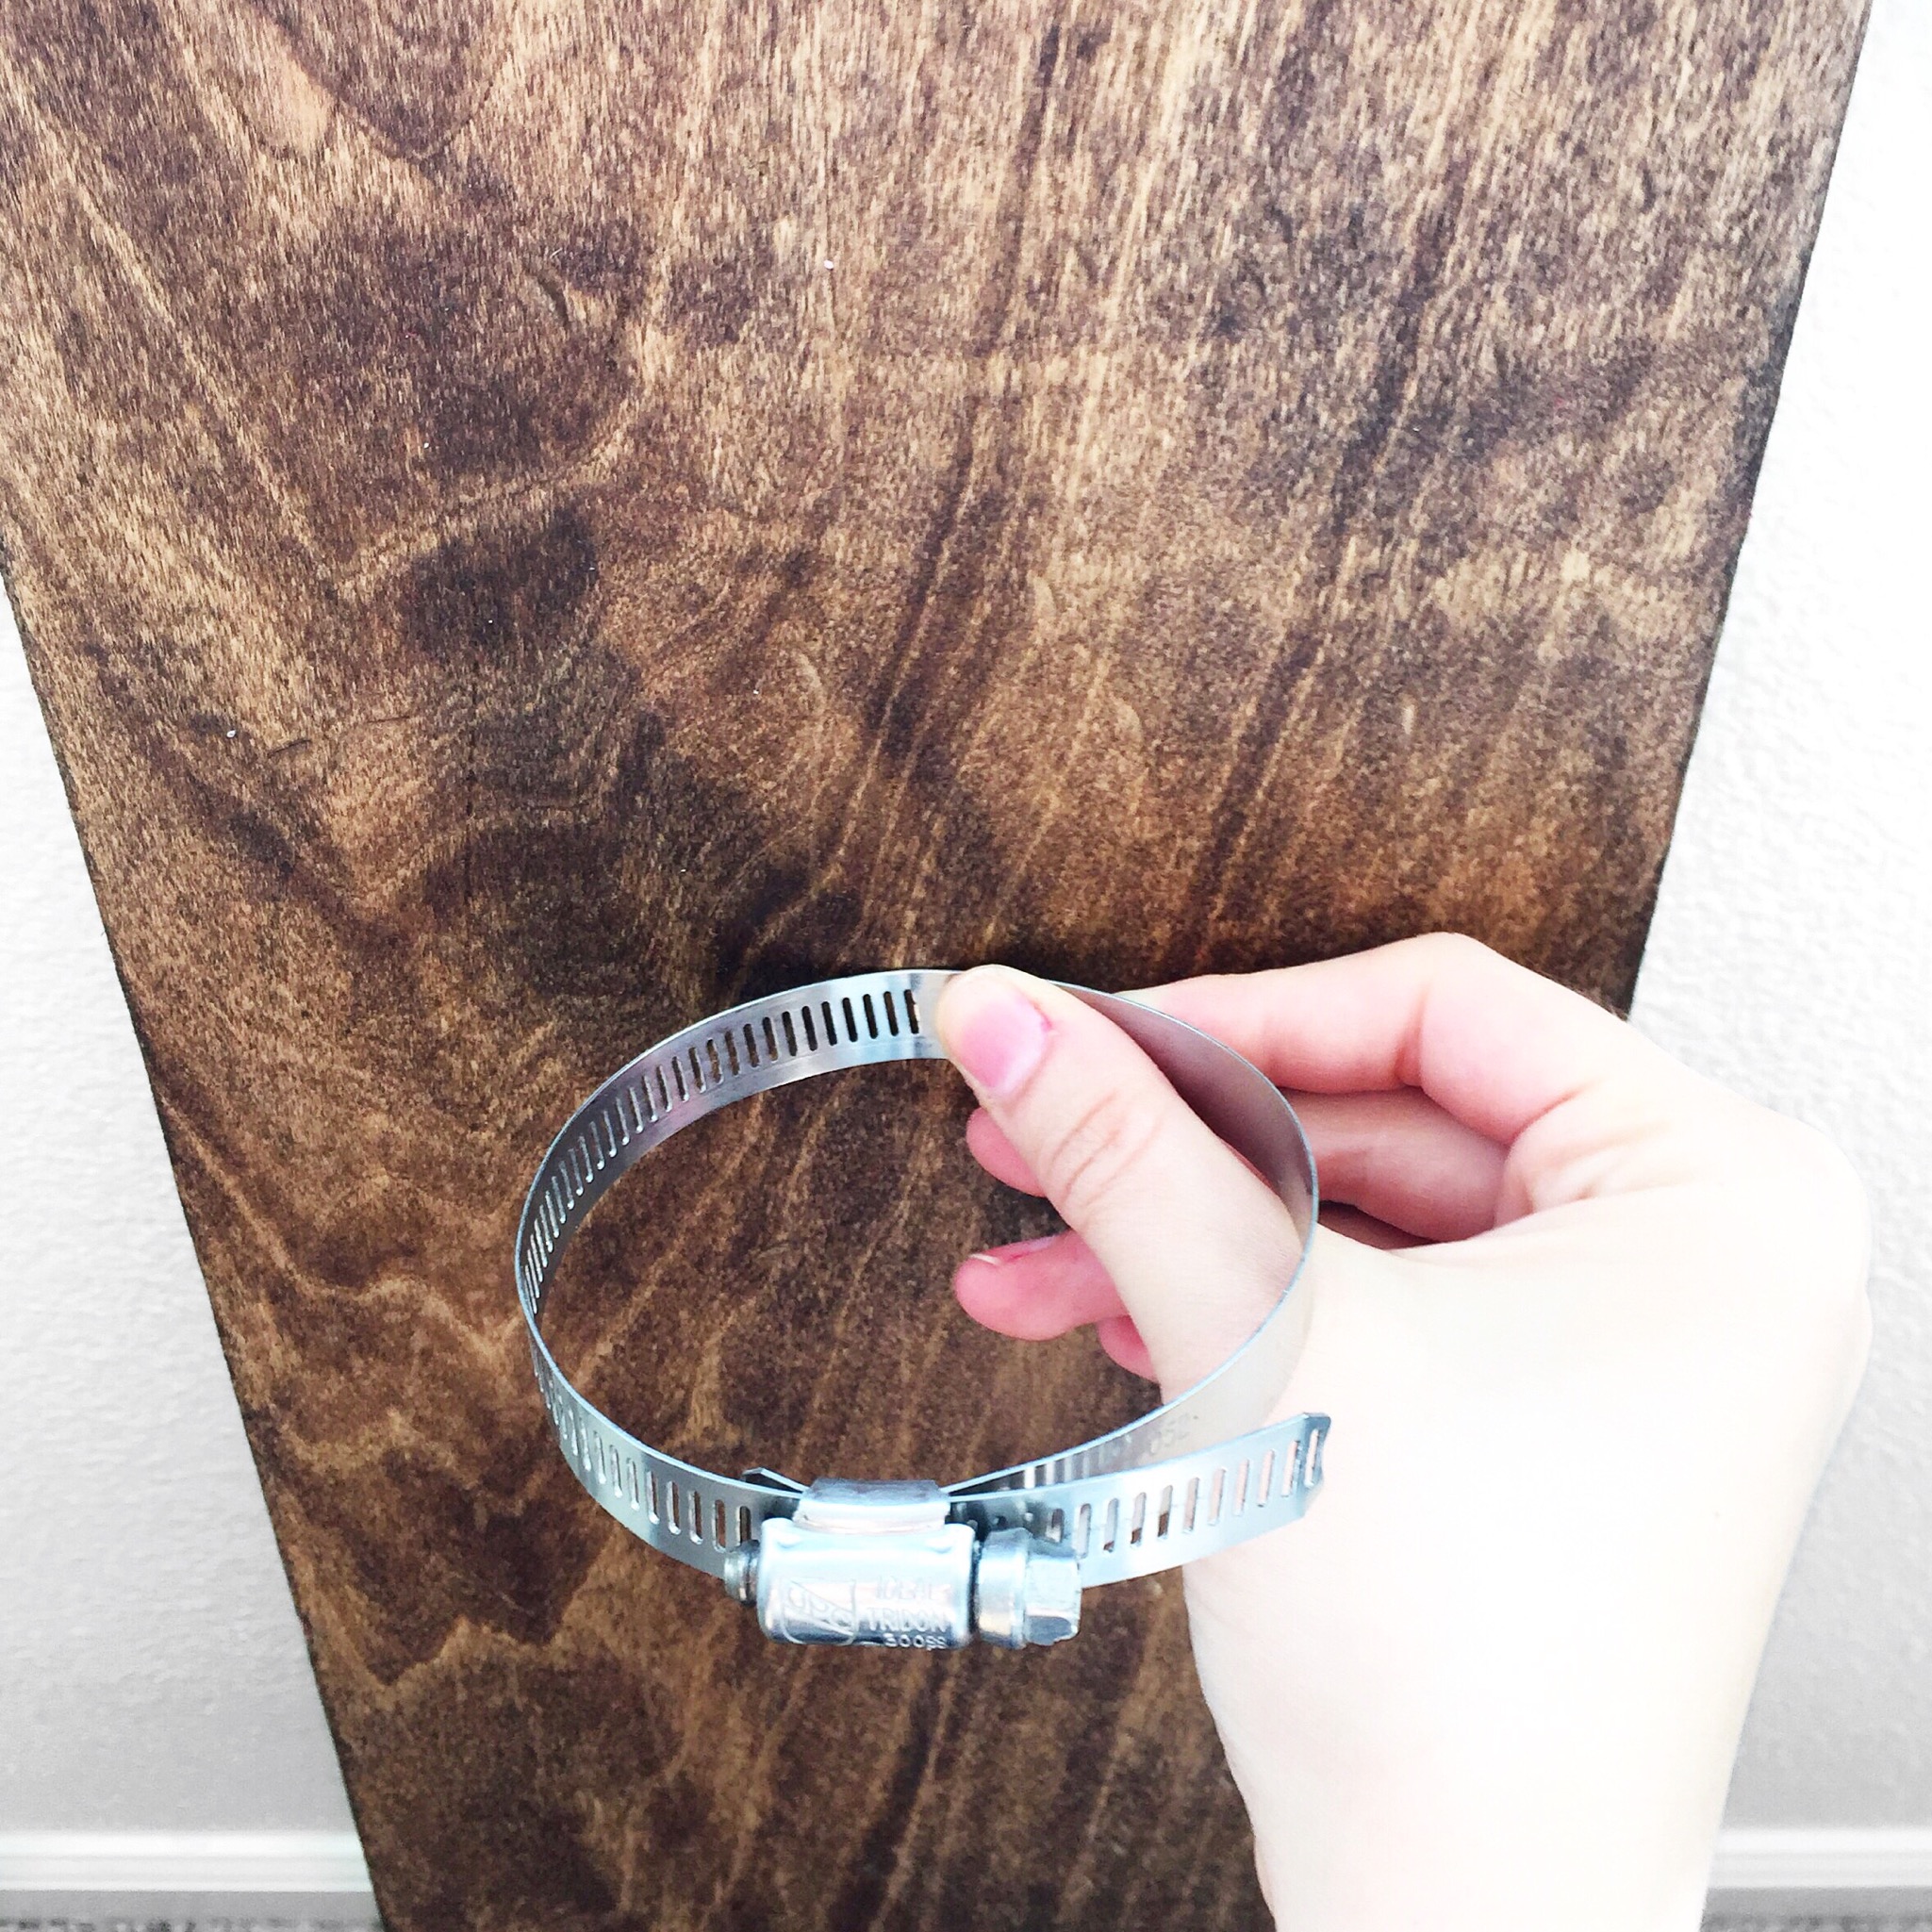
While you wait for the stain to dry, prepare your metal fittings. These things were mind boggling to me at first but that's what I have Kyle for - to problem solve when I get easily and quickly frustrated by something! Slip the fitting over your metal pail to get an idea of how much it needs to be adjusted to fit snuggly. Take it back off to adjust until you find the right size. To do this, simply move the screw to the left or the right (depending on if you need it larger or smaller - righty tighty, lefty loosey, people!). The teeth on the screw will grab those slots in the fitting and easily adjust the sizing. Line up all three pails to make sure your fittings are sitting at the same-ish spot on each so they look uniform!
I left my wood outside overnight to air out which is definitely a must! Once it's ready to come back in, measure out where you want each pail to hang. If you're using a tall Aloe Vera plant like I did, make sure there's room for it in there! After you've marked your placement with a pencil, take a short screw and pre-drill a hole in each spot. Next, line up your first fitting to where the last available slot is centered on your mark. The bolt on the fitting should be directly centered in the front. Drill the screw right into the last spare hole until it sits flat. Repeat for each! I highly recommend having an extra set of hands to hold on - tightly - to the fitting while you drill. The metal is a little hard to get through so you'll definitely need help!
At this point, you can also add the hanging hardware to the back of the wood somewhere in the center near the top. Push in the sawtooth and then tap the sides with a hammer to make sure it's secure. Use a little extra potting soil to prop up your succulents so they fit properly in each pail. Simply slide them in to their fittings and hang it up!
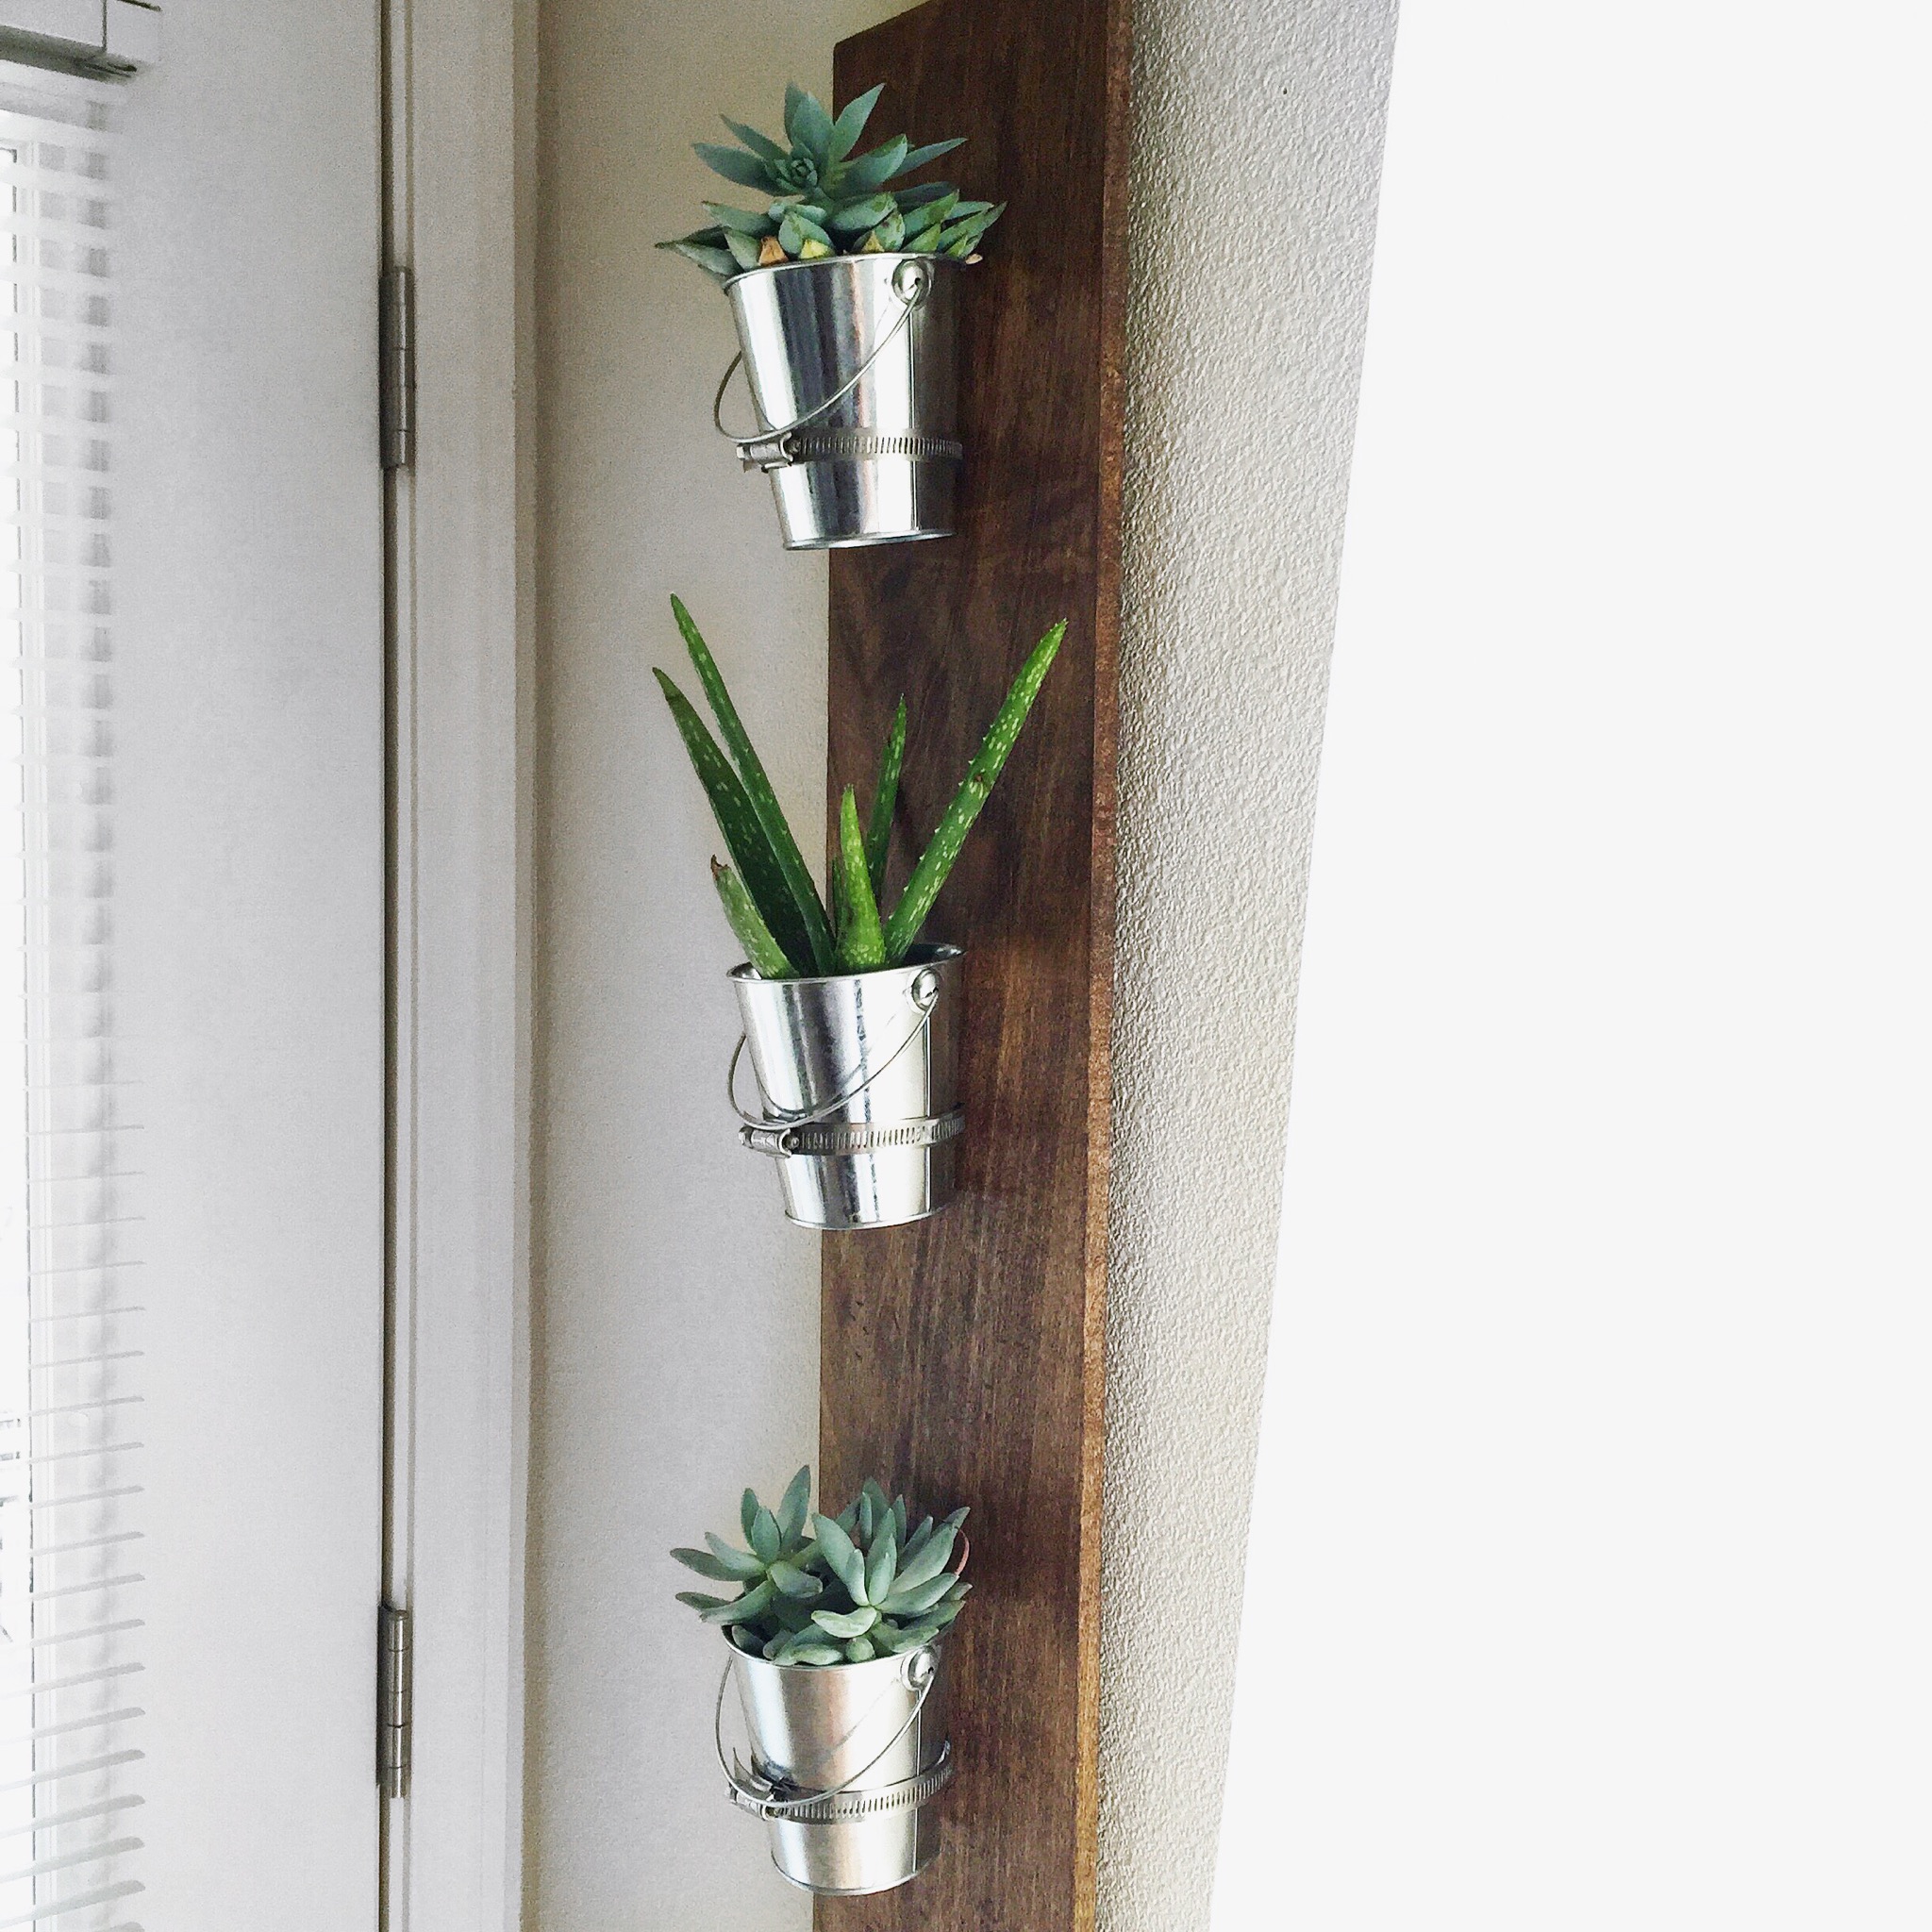
Note: Try to plan a spot where your finished project can hang in direct sunlight since these little succulents crave that bright sunshine. You could also use fresh herbs and hang them in the kitchen!

